


.gif
)


Saturday, March 9, 2013
Hi sweet peeps! I hope you're having a sweet Saturday so far. It's going to be a balmy 50deg F in New Hampshire today! lol We're off to the Y a little later this morning. My little girl has her first indoor rock climbing class and I have another Pump It! class...after recovering from the last one! lol
I wanted to pop in and share some of the photos of the mini quilt I finished this week. This is the first quilt I've ever completed! It may not be my last, but it was a lot of work just making one this size! I don't know how you all do those big ones! Hahaha
I wanted to pop in and share some of the photos of the mini quilt I finished this week. This is the first quilt I've ever completed! It may not be my last, but it was a lot of work just making one this size! I don't know how you all do those big ones! Hahaha

I'm not sure what the pattern is called, but I had found a photo of a mini quilt on Pinterest, figured out on my own how it was made, and used it as inspiration. In hindsight, I should have made the rectangles a little bigger so there wasn't as many pieces as there was. I would cut a bunch of rectangles, then realize I'd have to cut a bunch more because I didn't have enough! Oh, and next time, I'm investing in a rotary cutter and mat! I did all of this with a ruler and scissors and I was constantly measuring each piece to make sure they were all the same size! I also used a coordinating thread to hand quilt the front and back together. That was the fun part for me, seeing it all come together!
Here's what the entire quilt looks like and the matching pillowcase.

I machine stitched the binding to the back of the quilt, then folded it over to the front and hand stitched it to cover the machine stitching. The pillowcase was fun to make! I even made the pillow to go inside! Don't look too closely, because you will find where I didn't line the pieces up, but it was mostly where the lighter panels met the purple ones. I still think it's not bad for a complete beginner!
Here's a close up of the bedskirt I upcycled from a thrift store pillowcase.
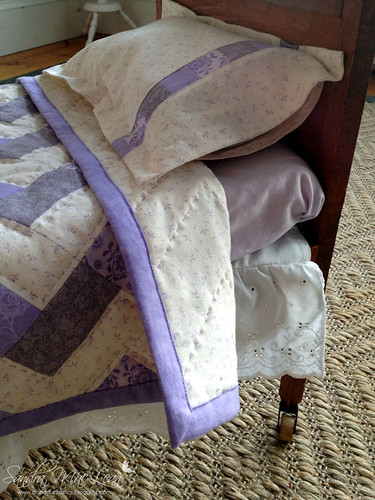
There was just enough eyelet lace to span both sides of the bed! I got lazy with the bed sheet and used another pillowcase we bought at the same thrift store. It works for now, so I may just leave it. Aren't those wooden castor wheels awesome?? We picked up the bed at an antique store in town for $10! It's old and in need of repair but it was worth every penny!
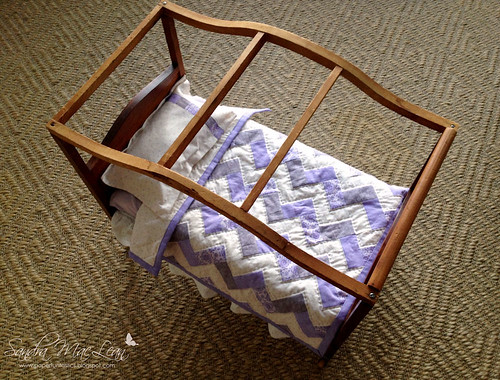
Here's a shot of the whole bed. It's a canopy bed and I've got my eyes out for more cheap eyelet lace so I can make the canopy for it. I might have to pop into that thrift store again today....you never know what you'll find in one! ;)
Have a great weekend everyone!


8 Comments:
WOW Sandra. You did wonderfully on your quilt! That bed was an amazing find, too. Not every little girl has an antique canopy bed for their doll! I haven't started my sheep stitching yet... been sick instead. : ( Have you started yours??
Tricia
Absolutely Darling! I love American Girl Dolls. This quilt and bed linens are perfect!
Kim
What a beautiful little quilt!! Love it!!
Oh my....this is so pretty....the colours are gorgeous, and love the blocks. A great result, and looks lovely on that cute bed.....well done!
Could you tell me what size the bed is? Reminds me of a doll bed. It is a nice old timey bed, and I love it. Thanks. Victoria
Awesome! Beautiful quilt and bed accessories, Sandra! What a deal on that darling doll bed!! A real treasure for your DD!
I have read so many articles concerning the blogger
lovers except this article is truly a nice post, keep it up.
Here is my weblog: http://klaniny.vot.pl
That is BEAUTIFUL! I can't believe you did all that by hand! Well, I can believe it, but it's awesome. I'm sure Syd will cherish it.
Post a Comment